Best .htaccess Hacks For Websites

The .htaccess configuration file on your server which controls Apache Server is an important file and a very powerful tool for your website if used properly. It is generally found in root of your web server. In this article I will share how .htaccess can help improve your website’s  stability, security, functionality and usability.

Please backup your .htaccess file before doing any changes. In case anything goes unexpected just replace the .htaccess with your backup.

Search Engine Friendly 301 Redirects

If you have moved your website to another domain and want to redirect all the pages to their new location or you want to redirect a particular URL to a specific page in most Search Engine Friendly manner then you can use the below code in your .htaccess.

## .htaccess Code :: BEGIN
Redirect 301 /Old_Directory/ http://www.new-domain.com/
## .htaccess Code :: END

Note: Remember not to insert “http://www” to the “/Old_Directory/”.

Block Requests From User Agents

By adding a ban list to your .htaccess file you can block all unwanted user agents. These agents at times are harmful and can can cause load on your server.

## .htaccess Code :: BEGIN
## Block Bad Bots by user-Agent
SetEnvIfNoCase user-Agent ^FrontPage [NC,OR]
SetEnvIfNoCase user-Agent ^Java.* [NC,OR]
SetEnvIfNoCase user-Agent ^Microsoft.URL [NC,OR]
SetEnvIfNoCase user-Agent ^MSFrontPage [NC,OR]
SetEnvIfNoCase user-Agent ^Offline.Explorer [NC,OR]
SetEnvIfNoCase user-Agent ^[Ww]eb[Bb]andit [NC,OR]
SetEnvIfNoCase user-Agent ^Zeus [NC]

Order Allow,Deny
Allow from all
Deny from env=bad_bot
## .htaccess Code :: END

Remove WWW from your website’s URL

If you wish to remove the “www” from your website’s URL, like http://your-domain.com instead of http://www.your-domain.com, then you can use the below code.

## .htaccess Code :: BEGIN
RewriteEngine on
Options +FollowSymLinks
RewriteCond %{HTTP_HOST} ^www\.your-domain\.com$ [NC]
RewriteRule ^(.*)$ http://your-domain.com/$1 R=301,NC]
## .htaccess Code :: END

Add WWW to your website’s URL

If you wish to add “www” your website URL, you can add the below code.

## .htaccess Code :: BEGIN
RewriteEngine On
Options +FollowSymLinks
RewriteCond %{HTTP_HOST} ^your-domain.com [NC]
RewriteRule ^(.*)$ http://www.your-domain.com/$1 [L,R=301]
## .htaccess Code :: END

Allow only specific IP addresses and block everyone else

If you want to allow only few particular IPs and deny everyone else then you can use the below code in your .htaccess file. Replace “http://www.your-domain.com/under_construction.html” with the error page which you will like to be displayed to everyone(except the particulars IPs) or you can simply omit the line if you don’t need it.

## .htaccess Code :: BEGIN
ErrorDocument 403 http://www.your-domain.com/under_construction.html
Order deny,allow
Deny from all
Allow from 172.16.254.1
Allow from 172.16.254.9
## .htaccess Code :: END

Ban only specific IP addresses and allow everyone else

If you think there are spammers regularly flooding your website you can simply ban their IP addresses to get rid of them and allow everyone else.

## .htaccess Code :: BEGIN
allow from all
deny from 172.16.254.6
deny from 172.16.254.5
## .htaccess Code :: END

Custom Error Pages

You must have already seen many custom 404 error pages, you can use the below code for error pages for 404 errors and other errors too.

## .htaccess Code :: BEGIN
ErrorDocument 401 /error/401.html
ErrorDocument 403 /error/403.html
ErrorDocument 404 /error/404.html
ErrorDocument 500 /error/500.html
## .htaccess Code :: END

Change Index Page

The default page of a regular server is either an index.html or index.php, you can use the below code to change it.

## .htaccess Code :: BEGIN
DirectoryIndex index2.html
## .htaccess Code :: END

Remove Extensions from Files

The below code removes extension in a URL, this make it the URL more Search Engine Friendly. Example: http://www.your-domain.com/about.php will be http://www.your-domain.com/about. You can replace .php with .html or whatever you want.

## .htaccess Code :: BEGIN
RewriteEngine On
RewriteBase /
RewriteCond %{REQUEST_FILENAME} !-f
RewriteCond %{REQUEST_FILENAME} !-d
RewriteRule ^(.+)$ /$1.php [L,QSA]
## .htaccess Code :: END

Disable Directory Browsing

You can block users from viewing directories without an index page using the below code.

## .htaccess Code :: BEGIN
Options All -Indexes
## .htaccess Code :: END

Disable Browser To Prompt Open/Save As Option

Usually when you try to download something you generally get asked whether to Save it or Open it. To disable this from server side, you can use the following code:

## .htaccess Code :: BEGIN
AddType application/octet-stream .mp3
AddType application/octet-stream .mpg
AddType application/octet-stream .avi
AddType application/octet-stream .mov
AddType application/octet-stream .pdf
AddType application/octet-stream .xls
AddType application/octet-stream .zip
## .htaccess Code :: END

Change Script Execution Type

If you have php within an html file, you can still execute it as php using the below code.

## .htaccess Code :: BEGIN
AddType application/x-httpd-php .html
## .htaccess Code :: END

Stop Execution of Script

If you want, you can stop scripts like php, asp, etc from executing and simply display them as plain text.

## .htaccess Code :: BEGIN
RemoveHandler cgi-script .php .asp .html
AddType text/plain .php .asp .html
## .htaccess Code :: END

Set Default Admin Email ID

Using below code you can set the default Email ID of your server.

## .htaccess Code :: BEGIN
ServerSignature EMail
SetEnv SERVER_ADMIN [email protected]
## .htaccess Code :: END

Disable Hotlinking

Using this disable users from using images hosted on your server in their website, this helps in saving bandwidth. You can do this by adding the below code, replace “http://your-domain.com/copyright.jpg” with the image which you will like to be displayed instead.

## .htaccess Code :: BEGIN
Options +FollowSymlinks
#Protect against hotlinking
RewriteEngine On
RewriteCond %{HTTP_REFERER} !^$
RewriteCond %{HTTP_REFERER} !^http://(www.)?your-domain.com/ [nc]
RewriteRule .*.(gif|jpg|png)$ http://your-domain.com/copyright.jpg[nc]
## .htaccess Code :: END

Enable Caching

The below code will tell the web browser to use cache instead when your website is loaded. It doesn’t directly increase the loading speed of your website, it will basically loads the cached content when the user visits your website second time. Currently the cache expiry time is set to 1 day(86400 seconds).

## .htaccess Code :: BEGIN
# BEGIN EXPIRES
ExpiresActive On
ExpiresDefault "access plus 86400 seconds"
ExpiresByType text/css "access plus 1 week"
ExpiresByType text/plain "access plus 1 month"
ExpiresByType image/gif "access plus 1 month"
ExpiresByType image/png "access plus 1 month"
ExpiresByType image/jpeg "access plus 1 month"
ExpiresByType application/x-javascript "access plus 1 month"
ExpiresByType application/javascript "access plus 1 week"
ExpiresByType application/x-icon "access plus 1 year"
# END EXPIRES
## .htaccess Code :: END

Blogging Tips for Better Search Engine Rankings

Despite of many articles on SEO for Blogs, I am writing this one because most of them need professional SEO techniques and good amount of time. Here I will be sharing few simple tips which can increase your Blog Post’s Search Engine Visibility and can be implemented while writing posts.

Keywords

Keywords are an important aspect for Search Engine Optimization, keywords are what we input when we search on web, picking up the correct keywords thus helps a lot in increasing your Blog Post’s Search Engine Rankings.

Selecting Keywords
When you are starting with your post, it is recommended to include keywords relevant to your post and which are more popular. You can use Google trends for checking popularity of the keywords, and then include the most popular and relevant keywords into your post. Inserting more popular keywords basically means that they are searched more, and hence chances of you getting Search Engine traffic also increases.

Inserting Them
Make sure all the keywords are relevant to your article and it is recommended to have one keyword per line, too much of keyword density or too similar keywords will only help you score negatively. It is also highly recommended to insert the keywords in the post title and subtitles(Between header tags) and you should time to time bold, italicize and underline keywords in between the paragraphs to emphasize them when Search Engine bots crawls your article.

Linking

Linking is also a very important aspect of Search Engine Optimization for Blogs, there are many long link building techniques and methods which give good results.

Interlinking
Interlinking for your Blog posts means that linking keywords or words of your article to other posts of your Blog. Below are two more good ways of interlinking.

Recent Posts Or Further Reading
You can also include a “Recent Posts” Or “Further Reading” section in footer of your post which will simply display related posts to your current post, this will alsoincrease usefulness of your article, like if your reader wants to learn more about that particular topic he/she can simply browse those links. If you are onWordPress, you can use WordPress Related Posts Plugin for inserting automated Related Posts rather than doing it manually.

Breadcrumbs
Its also advisable to have breadcrumbs in header of your posts or pages, breadcrumbs are navigational links which tells the location of your article,
like “Category>> Subcategory>> Article“,
Example: “Blogging Tips>> Making Money>> Choosing Advertising Platforms”. If you are on WordPress you can use Breadcrumb NavXT, it is a great plugins and produces breadcrumbs very efficiently.

I hope these few points helps you with Search Engine ranking for your articles.


Benefits of Using Own Domain Email on Google Apps Gmail

Your Email ID is a valuable marketing tool for you, and Email ID of your own domain tells that you have an online presence, where people can find you, etc. Its also a tool to promote your company, as you are promoting your domain by that. Your Email ID will promote your domain rather than Gmail or Yahoo. You can even see here why to go for own domain Email ID. ;-) You can have own domain Email ID using your hosting company’s web mail or buy Email space at some hosting company. But according to me, Google Apps Gmail is provides the best own domain email solutions, and above all, its free(Standard package). Below are few of the many reasons why you should use Google Apps Gmail for your Email purposes.

Reliability/Uptime

Our web servers keep experiencing downs and crashes, and it is a pain when you are on a shared server or low-memory VPS. Imagine you were using your hosting company’s web mail, and had to receive an important email that time when your website/server was down. It will simply bounce. By using Google Apps Gmail you overcome this, as when you use Google Apps all the associated data will be stored on Google Data centers which runs your Email services effortlessly and gives 99.9% uptime.

Collaboration

Domain users can share their calendar from any computer, see when people are available, send invitations, manage RSVPs, do real time editing on documents, spreadsheets & presentations. Also access Instant Messaging (IM)(Using Gtalk) from any computer.

Space

If you have a small dedicated or VPS Hosting, then you probably get small amount of hard drive space, and Email particularly takes a lot of space especially if you have many users. Going with Google Apps Email helps here again, as it provides at least 7 GB of storage on Email accounts and this also increases your server’s efficiency as the load is not on your server for the Email services.

Security

Your SMTP server might get flooded with Spam or SQL hacks might steal credentials of your users. You overcome these also because of Google Apps. You can even disable the email server that came with your hosting account, that is the IMAP/POP3 server and the SMTP. This saves memory too.

Conclusion

There are many more reasons for you to go with Google Apps Gmail, but if you need customized Email service for your company, like custom layout and branding on your users mailboxes then Google Apps Gmail might not be a great option as it isn’t really very flexible. If you need to use for personal purposes or branding doesnt matters, then Google Apps it is! Even if you have a huge organization you can still go with Google Apps as they have multiple editions to suit your needs, plus you get all the Google Apps benefits.

Sending HTML Emails using your Web-based Email account | Gmail | Yahoo | Hotmail

Yes, you can send your custom made HTML Email using your Web-based Email account account like Gmail, Yahoo, Hotmail, etc. Many people think HTML can only be send using Email Clients like Outlook or Thunderbird, etc. To send an HTML using your Web-based Email account, you need to do make a valid HTML Email Template first, like with in-line CSS, using Tables, absolute paths etc. Read here how to write an HTML Email. After you are done making it, upload it to your server or if you dont have one you can use a free web hosting service here or any other which you like. Make sure your HTML Email has absolute paths for everything, your readers are going to be at all different locations.

When done, open your Web-based Email account, click on Compose/New Mail, make sure you have Rich Formatting enabled. Also, open your HTML Email using your Web Browser. Select all on the HTML Email page using Ctrl+A(On Windows) Or Command-A(On Mac) and then paste it on your Rich Text Editor(where you are writing the Email) using Ctrl+V(On Windows) or Command-V(On Mac). Send it. Thats its. So easy to do.

Make sure HTML Email is properly formatted, be careful with it. CSS rules vary for Web-based emails, also it is not necessary that the receivers Email Client has HTML support it, it will go as plain text in that case, and if they are not web code friendly, they might just delete it in one go thinking it as some spam. Thus, you should give the receiver the opportunity to choose between HTML Email or plain text. Also if it is a commercial Email, make sure it follows CAN-SPAM Act of 2003.

Using Website Templates: Free vs Premium

Often Web Designers try to provide quick web design services to clients and for a low price to live up the competition. It is recommended in this case to use website templates to save time as well work within the client’s budget. There are ample of templates available for websites online, these templates are free as well as paid(premium). Templates can vary from client to client according to their website specifications/requirements. It is a myth that paid templates are better than free ones. While it is not always true.

Free Templates

In a free Website template you get a well put up website layout, with good CSS and minimal codes. Free Website Templates might not be heavy on JavaScript like jQuery plugins, or at times dont even include a simple image slider or any JavaScript at all. But this doesnt makes it an unfavorable option. You can add jQuery plugins like prettyPhoto for image galleries/lightboxes and you can use Google Web Fonts for typographies. These small customizations take your Free Template to Premium Template standards and are very easy to be implemented on your Template. You can customize these templates to a large extent and change the glance of the template according to your creativity. This would be an example of free website templates site, there are many more, may be many better ones too. But I personally like this one because, the website templates here are clean, well laid out and not messed up, that is minimal. It gives the web designer a good opportunity to work, and be artistic. Thats why for me free templates work as good as paid templates. Though be careful when using these templates, they at times have Copyright/Licensing restrictions.

Premium Templates

Premium Templates are like a ready made websites, most of them already have required scripts like JavaScript for Image Galleries, etc in place, where you just need to edit or add little HTML, they even have the best suited typographies already in them. Some of them have PHP forms also in place for Contact Pages. If time is an important element of your website, then you should go with Premium Templates as they generally require lesser customization, everything is styled in best possible manner with best possible appearance of the website and they have all functionalities needed by a standard website, most of them even provide support too which can help you if you are stuck somewhere. Customizing Premium Templates like changing color scheme, design, background etc is not difficult, they usually have PSDs included in them and at times come with various layout options and color schemes.

Going with Templates

Templates might be an easy way out, good in appearance, saves time, etc, but this doesn’t makes them the best option. Thousands of websites are made everyday, but good Templates are not that many. What happens generally is that those few templates gets used again and again in many websites, which takes away the exclusive feeling of your website. At times the client even mention not to use Templates at all, and fooling them is completely unethical. To overcome these, you should customizing the Template as much as you can, remember over customizing will just end you up in an ugly website. Just make sure your website stands apart in the crowd.

Conclusion

All in all, both the types of templates are good. Free templates just require little more of work than premium templates. Premium Website Templates are like completely cooked dish, and in Free Templates you need to cook little more at times, but you save $ also. In Premium Templates, you generally just need to fit content into it, style a little, and done. Also, if you want to show your real creative and artistic skills, then you can drop the template idea, and can create the whole website yourself, or just borrow a framework layout from your WYSIWYG editor like Dreamweaver.

UPDATE: Check out my free website template Elegant Press at https://priteshgupta.com/templates/elegant-press/.

Tackle Productivity lost due to Social Media using Chrome / Firefox Extension

You spend a lot of time on Internet without being productive at all, all thanks to those Social Media websites. Hours pass by doing not so productive work like updating your Facebook or Twitter, reading mails, watering plants on FarmVille, etc. You forget what you came to do.

Tackling it

If you are not happy with this, then you can take control of it by using an extension on your Web Browser. There are many time management desktop softwares available which you can easily get by searching on Internet. But here I am including the browser extensions, there are quite a few of these too, I am sharing two of them below, one is for Chrome and another is for Firefox.

Chrome: If you are on Google Chrome, there is this extension StayFocusd. Time Management Firefox, Chrome
You can allot time for particular website on per day basis using this extension. Like, you allot one hour for Facebook, this means you can not spend more than an hour on Facebook in total in a day, and you chose how you spend it throughout the day.

Firefox: If you are a Firefox user, you can use LeechBlock. You can specify which sites to block, and when to block them. Like blocking facebook.com from 1pm to 3pm or so. You can specify up to six sets of sites to block, with different times and days for each set.

Microsoft Office 365 public beta now available

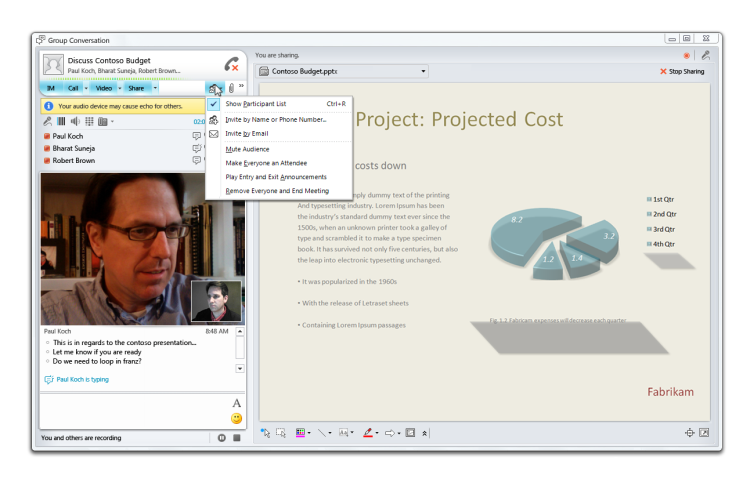
Microsoft had announced Microsoft Office 365 back in October 2010, the successor of Microsoft Office 2011. It will feature next generation cloud productivity service. This new version gives you access to email, calendar, and contacts from anywhere on a wide range of devices and enables real time editing of documents and spreadsheets with others.

Microsoft Office 365 will also feature tight security, it will help protect you from spam and viruses. It is called Microsoft Forefront Online Protection for Exchange, which includes multiple filters and virus-scanning engines.
The new version has set of web enabled tools, where you can view and edit documents with Office Web Apps on various web browsers. Like Google Apps, with more features and not being free.

The public beta is now available, you can see it at Office365.com.

Pricing and Licensing

The pricing is not really bad, neither very good. It starts with $6 per user per month for up to 50 users at max. Currently subscription is only available on a month-to-month basis with automatic renewal each month which you can cancel at any time with no early termination fee. Google Apps has a big edge over Office 365 in pricing.

Guide to Sitemaps – What? Why? How?

A website/blog is like a book, and thus it also needs a index or table of contents. In web terminology we call this ‘table of contents’ sitemap. There are mainly two kinds of sitemaps.

HTML Sitemap: It is meant to be accessed by your website’s visitors, which helps them to browse your website, see what they have point of interest in and increase your website’s/blog’s usability. It is simply a hierarchical list of links on a web page. Most of the (premium)WordPress themes now have in built Sitemap page template. Otherwise some or other WordPress plugin is always there to do the job. Click here for an example of a HTML Sitemap.

XML Sitemap: These kind of sitemaps are meant for search engine bots to crawl, you can submit one of these to search engines after building it. It is one of the most important aspect in large websites. Click here for an example of an XML Sitemap.

Creating a sitemap

HTML Sitemap

If you are using a CMS like WordPress or Joomla, both kinds of sitemaps can be built easily using various plugins/components, like you can use this to create a HTML Sitemap on WordPress.

Otherwise, if you have a normal website, you can easily create it with any usual WYSIWYG editor. You should start by creating a list of your pages, then adding the sub pages below the parent pages, and then linking them. After the skeleton has been made, style the sitemap page(using CSS),  match it to your website layout and then put it live after testing all the links.

XML Sitemap

Creating an XML sitemap has never been this easier. If you are on WordPress(like me) you can use this amazing plugin Google XML Sitemaps. It builds your sitemap very adequately also, it notifies all major search engines like Google, Bing, Yahoo etc, every time you create a post about the new content. If you are on Joomla, you can use Xmap it has much more features that its WordPress counter part.

Again, if you have a normal website, and you are an advanced user(who knows XML, HTML, etc) you can create the sitemap yourself. The below example shows a Sitemap in XML format. The Sitemap in the example contains a small number of URLs, each using a different set of optional parameters. Please remember that your sitemap should always be UTF-8 encoded.

{code type=XML}
<?xml version=”1.0″ encoding=”UTF-8″?>
<urlset xmlns=”http://www.sitemaps.org/schemas/sitemap/0.9″>
<url>
<loc>http://www.example.com/</loc>
<lastmod> 2005-01-01 </lastmod>
<changefreq>monthly</changefreq>
<priority> 0.8 </priority>
</url>
<url>
<loc>http://www.example.com/catalog?item=12&amp;desc=vacation_hawaii</loc>
<changefreq>weekly</changefreq>
</url>
<url>
<loc>http://www.example.com/catalog?item=73&amp;desc=vacation_new_zealand</loc>
<lastmod> 2004-12-23 </lastmod>
<changefreq>weekly</changefreq>
</url>
<url>
<loc>http://www.example.com/catalog?item=74&amp;desc=vacation_newfoundland</loc>
<lastmod> 2004-12-23T18:00:15+00:00 </lastmod>
<priority> 0.3 </priority>
</url>
<url>
<loc>http://www.example.com/catalog?item=83&amp;desc=vacation_usa</loc>
<lastmod> 2004-11-23 </lastmod>
</url>
</urlset>
{/code}

Thanks to sitemaps.org for supplying with this brilliant example,
you can see the tag definitions here.

The other and more recommended way to create sitemaps is to use any of the XML Sitemap Generator services available online, you can find plenty of them online.
The one I like is XML-Sitemaps.com (Maximum 500 pages).
It does most of the job itself, and just leaves the uploading part for you.

Specifying Sitemap in robots.txt file

You should include the location of your sitemap in your robots.txt file so that search engine finds it when accessing your robots.txt , you can insert it using the below code.
{code type=CSS}
Sitemap: http://www.example.com/sitemap.xml
{/code}


After you are done with your XML Sitemap. I will recommend you to submit it to your Google Webmaster account. Google will index it in a little while, and you can see effective results.

Other types of sitemaps

Of course there are few more kinds of sitemaps, I am including a few below.

RSS Feeds: They are not really sitemaps, but rather web feeds meant for feed readers, but they do work as great sitemaps for blogs.

ROR Sitemap: A variant of XML sitemaps, much more robust that XML and support various kinds of formats. See more here.

Video/Geo/ News Sitemap: They content links to your videos/geo-content/news articles so that they are searchable in Google Video/Google Maps/Google News.

Mobile Sitemap: Mobile sitemaps contain a lists of web pages made particularly for mobiles, for search engine’s mobile index. Here is an example of a Mobile Sitemap

Easiest way to redirect your website to iPhone/iPod Touch/iPad Version

Recently I had to redirect one of the website to its iPhone version, I quickly googled, there are dozens of sites which tell in dozens of ways for doing it. However, I wasn’t very impressed by any, so came up with my own end thing.
There are few ways, mainly you either use JavaScript or php.

I will go with JavaScript, since not all sites are php, and they can be handled more easily.

You can add the below JavaScript inside the of your website to redirect it to its iPhone version.

{code type=HTML}<script language=javascript>
if((navigator.userAgent.match(/iPhone/i)) || (navigator.userAgent.match(/iPod/i)))
{
location.replace(“iPhone/iPod_Version”);
}
</script>{/code}
Of course replace iPhone/iPod_Version with the URL of iPhone/iPod Touch version.

You can also add another conditional for iPad, which makes it.

{code type=HTML}<script language=javascript>
if((navigator.userAgent.match(/iPhone/i)) || (navigator.userAgent.match(/iPod/i)))
{
location.replace(“iPhone/iPod_Version”);
}
else if(navigator.userAgent.match(/iPad/i))
{
location.replace(“iPad_Version”);
}
</script>{/code}

In most cases iPad Version will be different from iPod/iPhone version(because of width). In case they are all the same, use

{code type=HTML}<script language=javascript>
if((navigator.userAgent.match(/iPhone/i)) || (navigator.userAgent.match(/iPod/i)) || (navigator.userAgent.match(/iPad/i)))
{
location.replace(“iPhone/iPad/iPod_Version”);
}
</script>{/code}

Running website on full screen(Available in iOS 2.1 and later)

If you will like your website to run on full screen, you can additionally add the below to header

{code type=HTML}

{/code}

The content=”yes” makes it run on full screen, you can always toggle this.

Disabling automatic detection of phone numbers(Available in iOS 1.0 and later)

By default Safari browser converts phone numbers like string into a link that calls the number.

{code type=HTML}

{/code}

By using content=”telephone=no” you are disabling this feature, you can toogle this too.

There are few more additional tags, you can check them out here .
Hope this helps you.

Tips for writing HTML Emails

Web Designers often create HTML Email Templates and face the problem of its compatibility on Email clients and Webmail especially. It might be like, Its running good on Yahoo, AOL. But fails in Gmail. Quite often, HTML Emails fail to load on Outlook 2007 and Outlook 2010.

I’ll like to share some tips using which one can create successful HTML Emails. So that your HTML Email loads properly in all the Mailboxes and Email clients

  1. The first basic rule of HTML Email is one single file, that is you can’t attach a style sheet. And you shouldn’t probably call it too, you should simply include something like
    {code type=HTML}<style type=”text/css”>.
    /* Your Style sheet */
    </style>{/code}
    Within the <head> of your Email HTML Template. But there is a big problem with it, Gmail doesn’t supports a style sheet, its only supports inline CSS. Thus you’ll need to convert it into an inline type with no external references to style using #Tags. That is something like {code type=CSS}<p style=”font-family: “Verdana”, Arial;”>{/code} Also, attachments are often stored in randomly named temporary cache folders by some email programs. They also hog a lot of bandwidth (especially when they bounce) so attachments are not the way to go. Simply upload your images into a public-accessible web sever and call your Images from there. Also remember not to resize the Image, stretched images may not render properly. All graphics should have their correct dimensions.
  2. Another thing important is, use as less CSS as you can . Desktop Email clients, mainly Outlook 2007 and Outlook 2010 doesn’t support most of the CSS. Outlook often converts your DIVS to paragraphs, so your DIVS will be messed up. Also, Avoid using “margin” or “padding” CSS properties in your TABLE tag. Cellpadding and Cellspacing attributes are generally safe but margin or padding will often be added to every TD within the table. Also, Outlook 2007 and 2010 impose a 2-pixel height minimum for table cells. So, for example, if a table cell contains a 1-pixel transparent gif and a background color, your ‘horizontal line’ will appear thicker than expected.
  3. Tables is the safest thing to use in HTML Email. Do not rely on CSS based layouts. Make Email layouts completely based on Tables. You may also nest tables in your HTML template. Its completely safe.
  4. One more thing important is, don’t have too wide templates for your HTML Email Template. We are not designing HTML sites here. The width should exceed 600px I believe. Think small!
  5. After you are done you can test you email in virtual Email simulation and testing websites. One good site I came across was http://www.emailonacid.com, here you can see how your Email will look in various Email programs.

I hope the above points help you. Good luck!