Making Devices on Portrait Orientation Behave like Mobile

How many times it has happened that a website looks perfect on landscape but gets screwed up in portrait, this happens since some tablets return static width, that is they will continue to return the same width in both landscape and portrait orientation, while some tablets return the width according to their orientation. I will explain this with a real example, iPad (all three) will return 768px as their width in both landscape and portrait orientation, although it should return 1024px in landscape mode, now what happens is, the website works well in landscape mode, however, in portrait orientation, the screen’s viewport becomes much smaller and the most irking part is, the same default list of styles will continue to be applied to it (because of it returning the same width), and as a result the whole website becomes a clutter, while **PlayBook **returns 1024px as width in landscape orientation and 600px in portrait orientation, so as soon as you tilt it, you can see the phone specific media query gets applied, to fix this, we can rewrite our phone specific media query like below, what it does is checks iPad’s orientation and applies the same specific styles as those of smartphones if the iPad is in portrait orientation.

@media handheld,
only screen and (max-width: 767px),
screen and (orientation: portrait) {
    /* ! All phone and tablets(in portrait orientation) specific CSS goes here */
}

Create WordPress Admin Account Using FTP/PHP

Here is a little snippet which can create a WordPress backend account with ease using the FTP, just paste this PHP snippet in the active theme’s functions.php and the account will be created. Also, make sure the username and the email are unique, or the function will fail.

function admin_account() {
    $user = 'AccountID';
    $pass = 'AccountPassword';
    $email = '[email protected]';

    if (!username_exists($user) && !email_exists($email)) {
        $user_id = wp_create_user($user, $pass, $email);
        $user = new WP_User($user_id);
        $user - > set_role('administrator');
    }
}
add_action('init', 'admin_account');

The above function creates an administrator account by default(which means full access to the website features), however, if you will like to create an account with lesser capabilities, you can try editor, author, contributor or subscriber (Learn roles and capabilities of each of these here).

Handy Collection of JavaScript Prototypes

Here is a handy collection of JavaScript prototypes compiled by James Haley, I personally found these quite useful and thus I am sharing them. These are pretty much self explanatory snippets and perform some regular tasks.

Array Remove – By John Resig (MIT Licensed)

Array.prototype.remove = function(from, to) {
    var rest = this.slice((to || from) + 1 || this.length);
    this.length = from < 0 ? this.length + from : from;
    return this.push.apply(this, rest);
};

Trim spaces

String.prototype.trim = String.prototype.trim || function() { return this.replace(/^\s+|\s+$/,""); }

Remove last full stop prototype

String.prototype.trimFullStops = function() { return this.replace(/^\.+|\.+$/,""); }

New line remove prototype

String.prototype.replaceNewLine = function() { return this.replace(/(\r\n|\r|\n)/g, ""); }

Replace breaks remove prototype

String.prototype.replaceBreaks = function() { return this.replace(/<br \/>|<br\/>/g, "\n"); }

String Trim to length or first Stop(.)

String.prototype.short = function(nLen) {
  var nFSPos = this.indexOf('.');
  return (this.length > nLen) ? ((nFSPos > -1) && (nFSPos < nLen + 1) && (nFSPos > 3)) ? this.split('.')[0].trim() + '…' : this.substring(0, nLen).trim() + '…' : this;
};

Encode for URL transport

String.prototype.encode = function() { return (this.length>0)?encodeURIComponent(this):this; };

Replace JS quotes

String.prototype.replaceQuotes = function() { return this.replace(/"/g,"\\\""); }

HTML remove tags prototype

String.prototype.stripTags = function() { return this.replace(/<\S[^>]*>/g, ""); }

Fix Numeric

String.prototype.tidyNumeric = function() { return Math.abs(this.replace(/[^0-9.]/ig,'').trimFullStops()); };

Tidy Decimal

Number.prototype.tidyDecimal = function(n) { return Math.abs(this.toFixed(n)); }

Convert to EM (base size 12px)

Number.prototype.toEm = function() { return (this/12).tidyDecimal(3); }

Right and Left cut

String.prototype.left = function(n) { return this.substr(0,n); }; String.prototype.right = function(n) { return this.substr((this.length-n),this.length); };

Convert date object into friendly string

Date.prototype.toClean = function() {
   if (this !== null) {
       var vDay = ((this.getDate()) < 10) ? '0' + (this.getDate()) : (this.getDate()),
           oMonths = ['Jan', 'Feb', 'Mar', 'Apr', 'May', 'Jun', 'Jul', 'Aug', 'Sep', 'Oct', 'Nov', 'Dec'],
           vMonth = oMonths[this.getMonth()],
           vYear = this.getFullYear().toString().right(2);
       return vDay + ' ' + vMonth + ' \'' + vYear;
   } else {
       return '[Invalid Date]';
   }

}

Convert date object into SQL supported

Date.prototype.toSQL = function() {
    var vDay = ((this.getDate()) < 10) ? '0' + (this.getDate()) : (this.getDate()),
        nMonth = (this.getMonth() + 1),
        vMonth = (nMonth < 10) ? '0' + nMonth : nMonth,
        vYear = this.getFullYear().toString(),
        vHours = ((this.getHours()) < 10) ? '0' + (this.getHours()) : (this.getHours()),
        vMinutes = ((this.getMinutes()) < 10) ? '0' + (this.getMinutes()) : (this.getMinutes()),
        vSeconds = ((this.getSeconds()) < 10) ? '0' + (this.getSeconds()) : (this.getSeconds());
    return vDay + '/' + vMonth + '/' + vYear + ' ' + vHours + ':' + vMinutes + ':' + vSeconds;
}

Remove all punctuation

String.prototype.clearPunc=function(){ return this.replace(/[\.,-\/#!$%\^&\*;:{}=\-_`~()]/g,"").replace(/\s{2,}/g," "); }

Highlight words by passed in value

String.prototype.highlight = function(vWords) {
    var oWords = vWords.clearPunc().stripTags().split(' '),
        vNewPhrase = this;
    oWords.each(function(o) {
        vNewPhrase = vNewPhrase.replace(new RegExp("(" + o + ")", "ig"), '<span class="highlight">$1</span>');
    });
    return vNewPhrase;
}
New Free Website Template Connoisseur

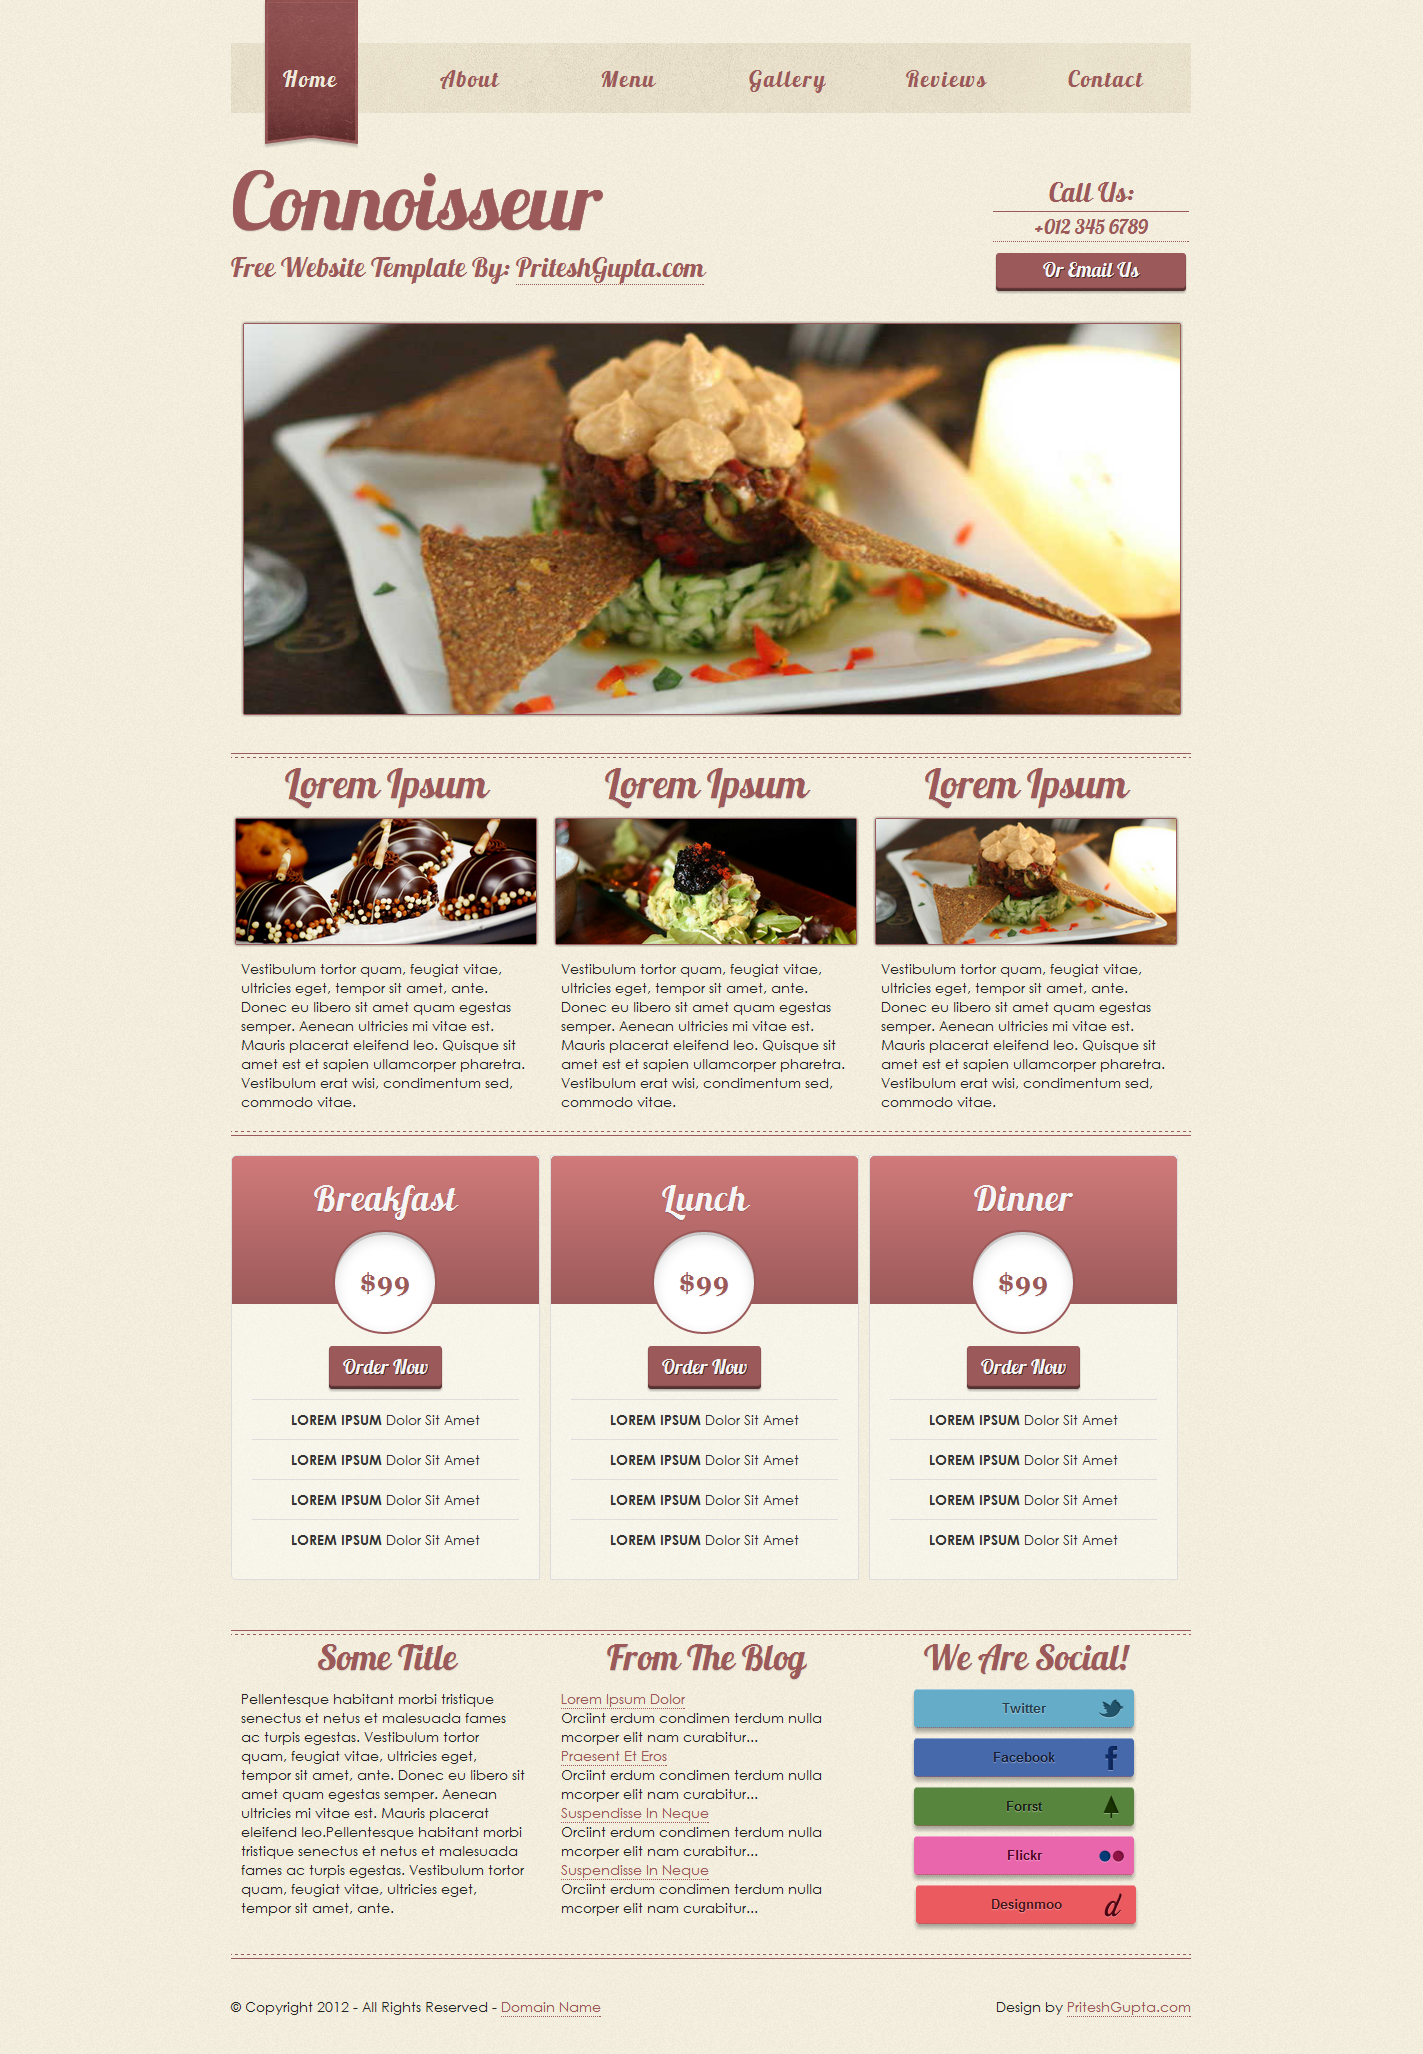
Here is a new free website template after a long long interval, this one is especially suited for websites pertaining to fine arts, cuisines, dining etc, and is also made using HTML5, CSS3 and some jQuery. The inspiration of navigation is not entirely mine, but rather taken from somewhere(which I exactly don’t remember), the slider used is Pikachoose and the gallery is fancybox(same as in Immaculate). I started working on this one almost three months ago but had to leave it in between due to my exams, however, now its completed and available for free download, its also licensed under New BSD License like my all other templates. You are free to do almost anything with it.

See its release page at https://priteshgupta.com/templates/connoisseur/, the download link available there only.

Detecting iPad 3 For Specific Stylesheet and Images

Displaying Retina Images

A basic script to replace the normal images with the iPad 3 optimized image(i.e. high resolution images), all you need to do is just keep the high resolution image with a “retina” extension. For example, imageABC.png becomes imageABCretina.png. Read here why you should do so.

<script type="text/javascript"> 
    $(document).ready(function() {
        var pixelRatio = window.devicePixelRatio ? window.devicePixelRatio : 1;
        images = document.getElementsByTagName("img"), num = images.length;
        if (navigator.userAgent.indexOf('iPad') >= 0 && pixelRatio >= 2 && ((screen.width == 768 && screen.height == 1024) || (screen.width == 1024 && screen.height == 768))) {
            for (i = 0; i <= num - 1; i++) {
                var temp = images[i].attributes['src'].value,
                    src = temp.substr(0, temp.lastIndexOf('.')) + 'retina' + temp.substr(temp.lastIndexOf('.'));
                images[i].src = src;
            }
        }
    });
</script> 

I am checking for user agent, screen width and pixelRatio since the screen width will double check that the device is an iPad and the pixel ratio will make sure its a 3rd Generation iPad, if we just use the pixelRatio, then this snippet will also apply for new iPhones(as they also have pixel ratio of 2). The screen width tends to remain 768 no matter what is the orientation(unlike other tablets in which they interchange if tilted), but I have still checked for other orientation if Apple ever decides to change how screen width and height are reported based on the device’s orientation.

iPad 3 Specific Stylesheet Similarly, we can also use iPad 3 specific stylesheet with a little help of

jQuery. Do notice here that earlier iPad(s) had 1024 x 768 resolutions, thus media queries specific to them will also work with the new iPad(since the iPad 3 also returns the same resolution only despite of being 2048 x 1536). This shows how you can even detect the landscape and portrait modes on the iPad(s).

<script type="text/javascript">
    $(document).ready(function() {
        var pixelRatio = window.devicePixelRatio ? window.devicePixelRatio : 1;
        if (navigator.userAgent.indexOf('iPad') >= 0 && pixelRatio >= 2 && ((screen.width == 768 && screen.height == 1024) || (screen.width == 1024 && screen.height == 768))) {
            $('head').append('<link rel="stylesheet" href="iPad3.css" type="text/css" />');
        }
    }); 
</script> 

Another way to achieve it using basic HTML is:

<link rel="stylesheet" media="only screen and (min-device-width: 768px) and (max-device-width: 1024px) and (-webkit-min-device-pixel-ratio: 2)" type="text/css" href="iPad3.css" />

Special thanks to Sean Smith for debugging and fixing code.

Getting WordPress on an Amazon EC2 at No Cost(Using OpenShift)

Having a website on WordPress platform requires us to have a web server to host our WordPress installation, though there are plenty of free and cheap offerings for WordPress web hosting, but they aren’t worth the trouble, and getting a good plan like dedicated server hosting means spending huge bucks.

One of the top notch web hosting service provided is Amazon EC2, having a website there gives us plenty of advantages like scalability(means we can scale up/down dynamically with no downtime), no server maintenance(as they will do it), easy upgrades of softwares(like php, MySQL) and plenty more. However, Amazon EC2 is not a “free web hosting” provider(although there is a Free Tier, but it is limited) but still we can get our website up there for no cost using OpenShift.

Openshift is a PaaS offering, which is meant for users and developers to share code/applications with community. That is, it is not exactly a web host, but you can host a WordPress installation in it as well. It also means that the PaaS provider will take care of all the security updates(and all that we get with regular Amazon EC2).

I am not going in details of how you can set up a WordPress installation on an OpenShift account since Amith Shah has already done this, check the blog post at http://log.amitshah.net/2011/12/blog-moved-to-wordpress-on-openshift/.

Disable textarea Resizing

Normally whenever we use textarea in pages, the browser allows the user to resize it, but at times this is not wanted(as it might screw the other aspects of the design). Here is how we can disable textarea resizing using basic CSS.

Old Method

In the old method, we needed to to specify the value of the CSS property of the

max-height/max-width same as height/width.

textarea { height:300px; width:400px; max-height:300px; max-width:400px; }

Though this method will work out well, but we still see that “resize” icon in corner.

New CSS3 Method

Hence, there is a better way to do this in CSS3. Instead of specifying the

max-height/max-width, we can simply mention resize: none.

textarea { height:300px; width:400px; resize:none; }

It works the same way, and this time without the “resize” icon in corner.

Optional/Conditional Resizing

For enabling only the horizontal resizing, we can replace the none with horizontal.

textarea { height:300px; width:400px; resize:horizontal; }

Similarly for enabling only the vertical resizing, we can replace the none with vertical.

textarea { height:300px; width:400px; resize:vertical; }

15 Free And Bracing Navigation Menus PSD

Here are 15 fresh and modern navigation menus with layered PSDs, you can find plenty of them in Internet, I have just filtered the best and most bracing ones. Please contact the respective authors of these PSD’s if you have any usage restrictions query.

Dark Navigation

Dark Navigation

Download 

Navigation & Search

Navigation & Search

Download 

Dropdown Navigation Bar

Dropdown Navigation Bar

Download 

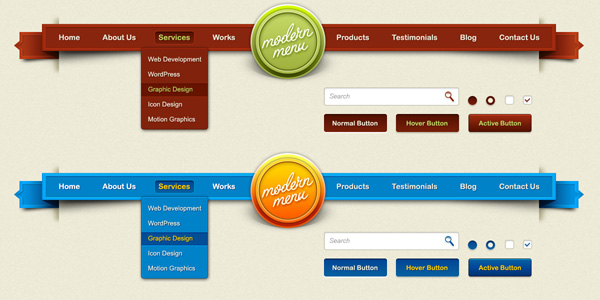
Modern menu & GUI elements

Modern menu & GUI elements

Download 

AWESOME MENU

AWESOME MENU

Download 

Breadcrumbs Navigation

Breadcrumbs Navagation

Download 

Ribbon Navigation

Ribbon Navigation

Download 

Sleek Dark Navigation Menu

Sleek Dark Navigation Menu Navigation

Download 

HORIZONTAL MENU

HORIZONTAL MENU

Download 

Simple Light Navigation

Simple Light Navigation

Download 

Breadcrumbs navigation

Breadcrumbs navigation

Download 

Navigation Bar

Navigation Bar

Download 

BREADCRUMBS

BREADCRUMBS

Download 

Simple navigation menu

Simple navigation menu

Download 

Ribbon menu

Ribbon menu

Download 

CSS3 Content Filter Using negation pseudo-class

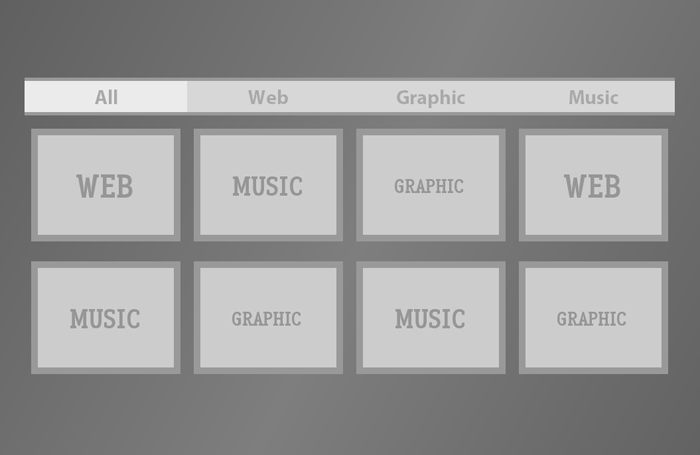
This tutorial shows how we filter content only by using CSS3 and then add some easing transitions to it. Content Filtering is done by CSS’ negation pseudo-class and the class attribute and the transitions are again by CSS only, there is no JavaScript/jQuery involved. You can see the code(s) below, download the full working file or check out a live demo. via vogtjosh.com

CSS3 Content Filter
Live Demo // Download

The Code

The CSS

body {
    width: 980px;
    margin-left: auto;
    margin-right: auto;
    font-family: "Myriad Pro", "Myriad Web", Myriad, Frutiger, Calibri, sans-serif, Arial Black, Gadget;
    overflow: hidden;
    background: #545454;
    background: -webkit-gradient(linear, left top, right bottom, from(#545454), color-stop(.5, #7e7e7e), to(#545454)) fixed;
    background: -webkit-linear-gradient(45deg, #545454, #7e7e7e .5, #545454);
    background: -moz-linear-gradient(45deg, #545454, #7e7e7e .5, #545454);
    background: -o-linear-gradient(45deg, #545454, #7e7e7e .5, #545454);
}
section {
    display: block;
    float: left;
    min-height: 450px;
    width: 100%;
}
a {
    display: block;
    float: left;
    width: 25%;
    text-decoration: none;
    text-align: center;
    padding: 5px 0;
    color: #a9a9a9;
    background: #d7d7d7;
    font-weight: bold;
    font-size: 30px;
    border-top: 5px solid #999;
    border-bottom: 5px solid #999
}
div {
    display: block;
    float: left;
    height: 150px;
    width: 205px;
    border: 10px solid #999;
    margin: 10px;
    -webkit-transition: all .85s linear;
    -moz-transition: all .85s linear;
    -o-transition: all .85s linear;
    -ms-transition: all .85s linear;
    transition: all .85s linear;
    margin-top: 20px;
}
div[class="web"] {
    background: url(images/web.jpg);
}
div[class="graphic"] {
    background: url(images/graphic.jpg);
}
div[class="music"] {
    background: url(images/music.jpg);
}
a:focus[class] {
    background: #ebebeb;
    outline: none;
}
a[class="web"]:focus ~ div:not([class="web"]) {
    height: 0px;
    width: 0px;
    border: none;
    margin: 0;
}
a[class="graphic"]:focus ~ div:not([class="graphic"]) {
    height: 0px;
    width: 0px;
    border: none;
    margin: 0;
}
a[class="music"]:focus ~ div:not([class="music"]) {
    height: 0px;
    width: 0px;
    border: none;
    margin: 0;
}

The HTML

<section>
    <a href="#" class="all" tabindex="-1">All</a> <a href="#" class="web" tabindex="-1">Web</a> <a href="#" class="graphic" tabindex="-1">Graphic</a> <a href="#" class="music" tabindex="-1">Music</a> 
    <div class="web"></div>
    <div class="music"></div>
    <div class="graphic"></div>
    <div class="web"></div>
    <div class="music"></div>
    <div class="graphic"></div>
    <div class="music"></div>
    <div class="graphic"></div>
</section>

Adding New Filters

Adding new filter is fairly easy, you can add as many filters as your want, add an anchor tag like below to the HTML Code.

<a href="#" class="FILTER" tabindex="-1">Filter Name</a>

With correspoing div for the Filter Content.

<div class="FILTER">
</div>

And add the CSS like below to the CSS Code.

a[class="FILTER"]:focus ~ div:not([class="FILTER"]) { height:0px; width:0px; border:none; margin:0; }

Where FILTER is the filter name, you will also need to change CSS of the layout if you intent to use the default file only.

Compatibility

For Working:

  • Firefox 3+
  • Safari 3+
  • Chrome (any)
  • Opera 10+
  • Internet Explorer 9+

For Transitions:

  • Firefox 4+
  • Safari 4+
  • Chrome 4+
  • Opera 10.5+

Simple Tooltip using jQuery

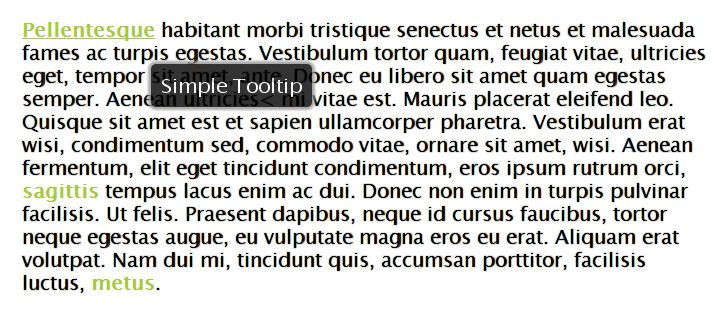
There are bunch of jQuery/JavaScript Tooltip plugins available on Internet, but most of them are heavy, and since generally our requirement is not that much, they become unfavorable to use. Thus, I wrote a small and simple code snippet for Tooltips which can be achieved via jQuery, it is easy to implement and use. CSS3 Tabs with CSS3 Navigation Menu
Live Demo
// Download

The Code

The JavaScript

Unlike other plugins for this same functionality, the JavaScript/jQuery code here is really small(and assumes that you have already included the jQuery library).

$(document).ready(function() {
    $('.simpleTooltip').hover(function() {
        var title = $(this).attr('title');
        $(this).data('tipText', title).removeAttr('title');
        $('<p class="tooltip"></p>').text(title).appendTo('body').fadeIn('slow');
    }, function() {
        $(this).attr('title', $(this).data('tipText'));
        $('.tooltip').remove();
    }).mousemove(function(e) {
        var mousex = e.pageX + 20;
        var mousey = e.pageY + 20;
        $('.tooltip').css({
            top: mousey,
            left: mousex
        })
    });
});

The CSS

This is the CSS for the actual tooltip, I have added some additional styling properties like circular borders, opacity and box shadow, though they are completely optional. If you encounter problems with width of the tooltip, you might try fixing the width of the tooltip rather than auto.

.tooltip {
    display: none;
    position: absolute;
    opacity: 0.80;
    width: auto;
    background-color: #000;
    padding: 10px;
    color: #fff;
    -webkit-border-radius: 5px;
    -moz-border-radius: 5px;
    border-radius: 5px;
    -moz-box-shadow: 0 0 3px 3px #959595;
    -webkit-box-shadow: 0 0 3px 3px #959595;
    box-shadow: 0 0 3px 3px #959595;
}

The HTML

The HTML again is very simple, just add the class simpleTooltip to any anchor link, and it’s title becomes the tooltip.

<a href="#" title="Text to be displayed in Tooltip" class="simpleTooltip">Hover for Tooltip</a>