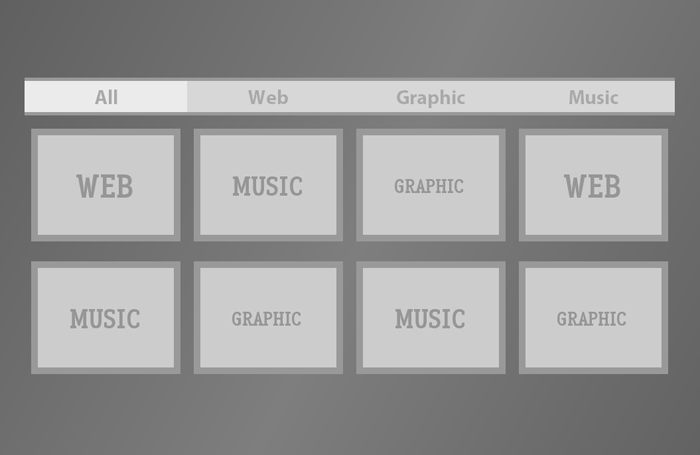
This tutorial shows how we filter content only by using CSS3 and then add some easing transitions to it. Content Filtering is done by CSS’ negation pseudo-class and the class attribute and the transitions are again by CSS only, there is no JavaScript/jQuery involved. You can see the code(s) below, download the full working file or check out a live demo. via vogtjosh.com
The Code
The CSS
body {
    width: 980px;
    margin-left: auto;
    margin-right: auto;
    font-family: "Myriad Pro", "Myriad Web", Myriad, Frutiger, Calibri, sans-serif, Arial Black, Gadget;
    overflow: hidden;
    background: #545454;
    background: -webkit-gradient(linear, left top, right bottom, from(#545454), color-stop(.5, #7e7e7e), to(#545454)) fixed;
    background: -webkit-linear-gradient(45deg, #545454, #7e7e7e .5, #545454);
    background: -moz-linear-gradient(45deg, #545454, #7e7e7e .5, #545454);
    background: -o-linear-gradient(45deg, #545454, #7e7e7e .5, #545454);
}
section {
    display: block;
    float: left;
    min-height: 450px;
    width: 100%;
}
a {
    display: block;
    float: left;
    width: 25%;
    text-decoration: none;
    text-align: center;
    padding: 5px 0;
    color: #a9a9a9;
    background: #d7d7d7;
    font-weight: bold;
    font-size: 30px;
    border-top: 5px solid #999;
    border-bottom: 5px solid #999
}
div {
    display: block;
    float: left;
    height: 150px;
    width: 205px;
    border: 10px solid #999;
    margin: 10px;
    -webkit-transition: all .85s linear;
    -moz-transition: all .85s linear;
    -o-transition: all .85s linear;
    -ms-transition: all .85s linear;
    transition: all .85s linear;
    margin-top: 20px;
}
div[class="web"] {
    background: url(images/web.jpg);
}
div[class="graphic"] {
    background: url(images/graphic.jpg);
}
div[class="music"] {
    background: url(images/music.jpg);
}
a:focus[class] {
    background: #ebebeb;
    outline: none;
}
a[class="web"]:focus ~ div:not([class="web"]) {
    height: 0px;
    width: 0px;
    border: none;
    margin: 0;
}
a[class="graphic"]:focus ~ div:not([class="graphic"]) {
    height: 0px;
    width: 0px;
    border: none;
    margin: 0;
}
a[class="music"]:focus ~ div:not([class="music"]) {
    height: 0px;
    width: 0px;
    border: none;
    margin: 0;
}
The HTML
<section>
    <a href="#" class="all" tabindex="-1">All</a> <a href="#" class="web" tabindex="-1">Web</a> <a href="#" class="graphic" tabindex="-1">Graphic</a> <a href="#" class="music" tabindex="-1">Music</a>
    <div class="web"></div>
    <div class="music"></div>
    <div class="graphic"></div>
    <div class="web"></div>
    <div class="music"></div>
    <div class="graphic"></div>
    <div class="music"></div>
    <div class="graphic"></div>
</section>
Adding New Filters
Adding new filter is fairly easy, you can add as many filters as your want, add an anchor tag like below to the HTML Code.
<a href="#" class="FILTER" tabindex="-1">Filter Name</a>
With correspoing div for the Filter Content.
<div class="FILTER">
</div>
And add the CSS like below to the CSS Code.
a[class="FILTER"]:focus ~ div:not([class="FILTER"]) { height:0px; width:0px; border:none; margin:0; }
Where FILTER is the filter name, you will also need to change CSS of the layout if you intent to use the default file only.
Compatibility
For Working:
- Firefox 3+
- Safari 3+
- Chrome (any)
- Opera 10+
- Internet Explorer 9+
For Transitions:
- Firefox 4+
- Safari 4+
- Chrome 4+
- Opera 10.5+
