CSS3 Tabs with CSS3 Navigation Menu

Whenever we think about tabs, we think about JavaScript. But tabs can be created using CSS only as well. Even the transitions can be achieved using CSS. These tabs behave like general JavaScript Tabs. I am using the Navigation Menu which I created a while ago, the navigation menu gives the ability to link to specific tabs through hash tags in the URL. CSS3 Tabs with CSS3 Navigation Menu
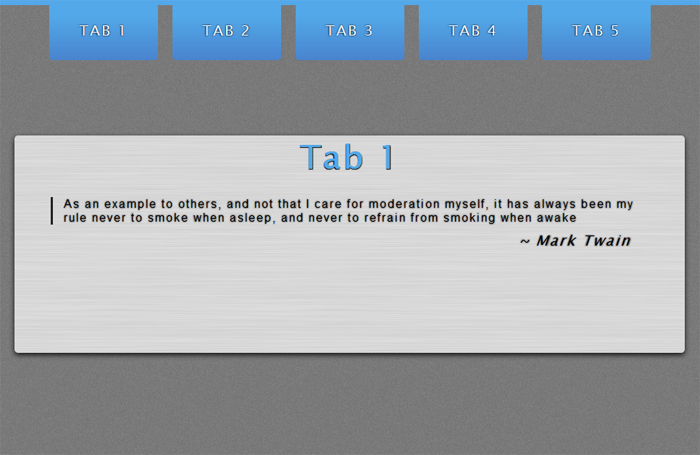
Live Demo // Download

The Code

The CSS

body {
    font-family: 'Lucida Sans Unicode', 'Lucida Grande', sans-serif;
    background: #545454;
    margin: 0;
    border-top: 7px solid #52a8e8;
    text-shadow: 0 0 3px rgba(0, 0, 0, 1);
    letter-spacing: 2px;
    font-size: 20px;
    background: #fff url(grain.png);
}
a {
    text-decoration: none;
    color: #fff;
}
header {
    width: 870px;
    margin-left: auto;
    margin-right: auto;
}
header nav a {
    position: relative;
    float: left;
    width: 150px;
    text-align: center;
    padding-top: 23px;
    padding-bottom: 30px;
    margin-right: 20px;
    -webkit-border-bottom-right-radius: 5px;
    -webkit-border-bottom-left-radius: 5px;
    -moz-border-radius-bottomright: 5px;
    -moz-border-radius-bottomleft: 5px;
    border-bottom-right-radius: 5px;
    border-bottom-left-radius: 5px;
    -webkit-transition: all .25s ease-out;
    -moz-transition: all .25s ease-out;
    -o-transition: all .25s ease-out;
    background: #52a8e8;
    background: -webkit-gradient(linear, left top, left bottom, color-stop(.2, #52a8e8), color-stop(1, #4984ce));
    background: -moz-linear-gradient(center top, #52a8e8 20%, #4984ce 100%);
    background: -o-linear-gradient(#52a8e8, #4984ce);
}
header nav a:hover {
    padding-top: 53px;
    padding-bottom: 60px;
    -webkit-transition: all .25s ease-out;
    -moz-transition: all .25s ease-out;
    -o-transition: all .25s ease-out;
}
h1 {
    clear: both;
    text-align: center;
    font-size: 45px;
}
blockquote {
    font: 16px normal helvetica, sans-serif;
    margin-top: 10px;
    margin-bottom: 10px;
    margin-left: 50px;
    padding-left: 15px;
    border-left: 3px solid #222;
    text-shadow: 0 0 2px rgba(0, 0, 0, 0.50);
}
.author {
    float: right;
    padding-right: 75px;
    text-shadow: 0 0 2px rgba(0, 0, 0, 0.50);
}
#box {
    margin: 150px auto;
    width: auto;
    text-align: left;
}
a {
    text-decoration: none;
}
ul {
    list-style: none;
}
#boxes {
    width: 925px;
    margin-left: auto;
    margin-right: auto;
    position: relative;
    min-height: auto;
}
.box:target,
.box:first-child {
    opacity: 1;
    -moz-opacity: 1;
}
.box {
    opacity: 0;
    -moz-opacity: 0;
    position: absolute;
    top: 0;
    left: 0;
    width: auto;
    -webkit-transition: all .5s;
    -moz-transition: all .5s;
    -o-transition: all .5s;
    transition: all .5s;
}
.box:target span {
    height: auto;
    width: auto;
    background: #fff;
    display: block;
    position: absolute;
    top: -32px;
    z-index: 0;
}
.box ul,
.box p {
    line-height: 1.5em;
    padding-top: 1em;
}
#boxes a {
    color: #52a8e8;
    text-shadow: 0 1px 1px rgba(0, 0, 0, 1);
}
.box li a {
    display: block;
    line-height: 2.2em;
    font-size: 14px;
    margin-bottom: 6px;
    padding-left: 10px;
}
#boxes ul li a:hover {
    color: #fff;
    font-weight: bold;
    text-decoration: none;
}
.container {
    height: 300px;
    width: 925px;
    margin-left: auto;
    margin-right: auto;
    background: #fff url(lines.png);
    -webkit-box-shadow: #131313 0px 2px 10px;
    -moz-box-shadow: #131313 0px 3px 10px;
    box-shadow: #131313 0px 3px 10px;
    -webkit-border-bottom-right-radius: 5px;
    -webkit-border-radius: 5px;
    -moz-border-radius: 5px;
    border-radius: 5px;
}

The HTML

<header>
    <nav> [TAB 1][1] [TAB 2][2] [TAB 3][3] [TAB 4][4] [TAB 5][5] </nav>
</header>
<div id="box">
    <ul id="boxes">
        <li id="1" class="box">
            <div class="container">
                <h1>
                    <a href="https://priteshgupta.com/" target="_blank">Tab 1</a>
                </h1>
                <blockquote>
                    As an example to others, and not that I care for moderation myself, it has always been my rule never to smoke when asleep, and never to refrain from smoking when awake <br />
                </blockquote>
                <em class="author">~ Mark Twain</em>
            </div>
            <span></span>
        </li>
        <li id="2" class="box">
            <div class="container">
                <h1>
                    <a href="https://priteshgupta.com/" target="_blank">Tab 2</a>
                </h1>
                <blockquote>
                    Anger is an acid that can do more harm to the vessel in which it is stored than to anything on which it is poured <br />
                </blockquote>
                <em class="author">~ Mark Twain</em>
            </div>
            <span></span>
        </li>
        <li id="3" class="box">
            <div class="container">
                <h1>
                    <a href="https://priteshgupta.com/" target="_blank">Tab 3</a>
                </h1>
                <blockquote>
                    A man's character may be learned from the adjectives which he habitually uses in conversation <br />
                </blockquote>
                <em class="author">~ Mark Twain</em>
            </div>
            <span></span>
        </li>
        <li id="4" class="box">
            <div class="container">
                <h1>
                    <a href="https://priteshgupta.com/" target="_blank">Tab 4</a>
                </h1>
                <blockquote>
                    Biographies are but the clothes and buttons of the man. The biography of the man himself cannot be written <br />
                </blockquote>
                <em class="author">~ Mark Twain</em>
            </div>
            <span></span>
        </li>
        <li id="5" class="box">
            <div class="container">
                <h1>
                    <a href="https://priteshgupta.com/" target="_blank">Tab 5</a>
                </h1>
                <blockquote>
                    But who prays for Satan? Who, in eighteen centuries, has had the common humanity to pray for the one sinner that needed it most? <br />
                </blockquote>
                <em class="author">~ Mark Twain</em>
            </div>
            <span></span>
        </li>
    </ul>
</div>

Adding New Tabs

Adding new tabs is really easy, you can add as many tabs as you want, just add another hyperlink within <strong><nav></strong> with the anchor link as the hash-tag that matches the ID of the Tab. And then, to add the Tab(Content), add something like:

<li id="ID" class="box">
    <div class="container">
        <h1><a href="https://priteshgupta.com/" target="_blank">Some Heading</a></h1>
        <blockquote>Biographies are but the clothes and buttons of the man. The biography of the man himself cannot be written <br> </blockquote>
        <em class="author">~ Mark Twain</em> 
    </div>
    <span></span> 
</li>

Within <ul id="boxes">, where ‘ID’ is is the ID of the Tab.

Compatibility

For Working:

  • Firefox 3+
  • Safari 3+
  • Chrome (any)
  • Opera 10+
  • Internet Explorer 9+

For Transitions:

  • Firefox 4+
  • Safari 4+
  • Chrome 4+
  • Opera 10.5+

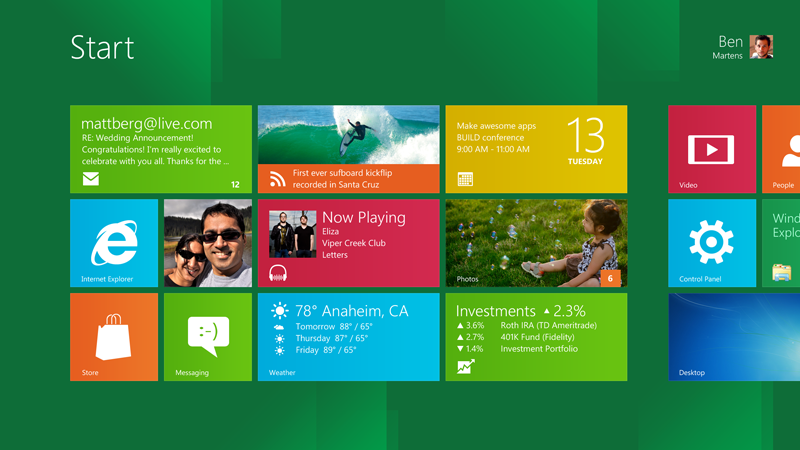
Download Windows 8 Developer Preview

The Windows 8 Developer Preview is now available for download on Windows Dev Center, this is a pre-beta version of Windows 8(and is for production environment mainly). What gives Windows 8 an edge over predecessor Windows 7 is that, Windows 8 is a tablet oriented operating system and has a very friendly and interactive interface for tablets/touchscreens while being equally good with normal PCs(ones with a Keyboard and a Mouse). The download is available here which includes the prerelease software. Since this a preview, many new features still need to be implemented(and some might get removed too) and do remember, this release is not really very stable. Folks at Ars Technica have written a nice Hands-on article on the prerelease software, check it out here.

Also, if you will like to experience a similar interface on your Windows, then you can check out Omnimo UI(Which is used with Rainmeter), its actually pretty good in giving you a Windows 8 like interface and even I use it.

Flip or Reverse Text Using CSS

As title says, we can Flip Text Upside Down or Reverse Text using CSS only(Rather than some jQuery Plugin or JavaScript). The CSS is completely Cross-browser compatible(Yeah, even older IEs), check out the CSS below.

Flipping Text Upside Down

-webkit-transform:rotate(-180deg);
-moz-transform:rotate(-180deg);
-o-transform:rotate(-180deg);
transform:rotate(-180deg);
ms-filter:"progid:DXImageTransform.Microsoft.BasicImage(rotation=2)";
filter:progid:DXImageTransform.Microsoft.BasicImage(rotation=2);

Reversing Text

direction: rtl;
unicode-bidi: bidi-override; 

Live Demo

Here is a live demo of implementation of above snippets:

Flipping Text

Reversing Text

Alternatively, you can see them here.

Advanced Image Functions using PHP

Here are some PHP Functions for Images which I came across recently, these come under GD and Image Functions and require GD library. I have taken most of these from PHP Manual and they are quite helpful.

Sharpening All Images

function imagesharpen($image) {
    $matrix = array(array(-1, -1, -1), array(-1, 16, -1), array(-1, -1, -1), );
    $divisor = array_sum(array_map('array_sum', $matrix));
    $offset = 0;
    imageconvolution($image, $matrix, $divisor, $offset);
    return $image;
}

Sharpening Images via Function

<?php
function GDThrowError($message) { 
    // don't throw plain text errors in a function that's supposed to return an image 
    // as per "the principle of least astonishment": the user is expecting 
    // a jpeg, and they'll be less astonished to get a JPEG error message 
    // than they would be if they got plain text.  Imagine this was called 
    // from an image tag, which makes sense, that's how you use images: 
    // plain text errors won't even reach most users, they'd have to copy 
    // the img src into the address bar.  It probably wont' even occur to 
    // them, as it's not typically helpful to view the source of an image 
    // resource. 
    $font = 2; 
    // create a canvas with a bit of padding 
    $errimg = imagecreate((imagefontwidth($font) * strlen($message)) + 20, imagefontheight($font) + 10); 
    $bg = imagecolorallocate($errimg, 255, 255, 255); 
    $textcol = imagecolorallocate($errimg, 0, 0, 0); 
    imagestring($errimg, 2, 10, 5, $message, $textcol); 
    header('Content-type: image/jpeg');  
    imagejpeg($errimg); 
    imagedestroy($errimg); 
} 

function GDMakeJpegLookLikeCrap($target) { 
    // image dimensions are no longer needed (see below), but getimagesize can do some simple validation 
    if (($dims = @getimagesize($target)) === false || $dims['mime'] != 'image/jpeg') 
    { 
        GDThrowError('The file you specified couldn\'t be found or is not a valid jpeg image.  Make sure you spelled it correctly and provided the correct path.'); 
       return(false); 
    } 
    // the original function creates a new image and resamples the source to it using the same height and width here. 
    // I imagine this was to add future resizing functionality but as it is it does nothing but waste resources 
    $image = imagecreatefromjpeg($target); 
    // don't really know/care what this is.  If you're interested see http://us2.php.net/imageconvolution         
    // try tweaking these three vars for different effects, but there is a sharpening function in the php docs (above links) and it's not a trivial operation 
    $spnMatrix = array( array(-1,-1,-1,), 
                        array(-1,16,-1,), 
                        array(-1,-1,-1));  
    $divisor = 8;  
    $offset = 0;  
    imageconvolution($image, $spnMatrix, $divisor, $offset);  
    // I like to send headers as late as possible to avoid already sent errors and duplicate header content 
    header('Content-type: image/jpeg');  
    imagejpeg($image, null, 100);  
    imagedestroy($image);   
} 

// example call 
$s_image = (isset($_GET['image'])) ? $_GET['image'] : null; 

if (preg_match('/\.(jpg|jpeg)$/i', $s_image)) { 
    GDMakeJpegLookLikeCrap($s_image);   
} else { 
    GDThrowError('Please specify a jpeg file to sharpen in the form: ' . $_SERVER['PHP_SELF'] . '?image=filename.jpg'); 
} 
?>

Convert Image To PGM/Grayscale

<?php
function imagepgm($image, $filename = null) {
    $pgm = "P5 ".imagesx($image)." ".imagesy($image)." 255\n";
    for ($y = 0; $y < imagesy($image); $y++) {
        for ($x = 0; $x < imagesx($image); $x++) {
            $colors = imagecolorsforindex($image, imagecolorat($image, $x, $y));
            $pgm .= chr(0.3 * $colors["red"] + 0.59 * $colors["green"] + 0.11 * $colors["blue"]);
        }
    }
    if($filename != null) {
        $fp = fopen($filename, "w");
        fwrite($fp, $pgm);
        fclose($fp);
    } else {
        return $pgm;
    }
}
?>

Giving Image Sepia Effect

<?php
// replace with your files
$originalFileName    = $filename;
$destinationFileName = "2".$filename;

// create a copy of the original image
// works with jpg images
// fell free to adapt to other formats ;)
$fullPath = explode(".",$originalFileName);
$lastIndex = sizeof($fullPath) - 1;
$extension = $fullPath[$lastIndex];
if (preg_match("/jpg|jpeg|JPG|JPEG/", $extension))
{
    $sourceImage = imagecreatefromjpeg($originalFileName);
}

// get image dimensions
$img_width  = imageSX($sourceImage);
$img_height = imageSY($sourceImage);

// convert to grayscale
// note: this will NOT affect your original image, unless
// originalFileName and destinationFileName are the same
for ($y = 0; $y <$img_height; $y++) { 
    for ($x = 0; $x <$img_width; $x++) { 
        $rgb = imagecolorat($sourceImage, $x, $y);
        $red   = ($rgb >> 16) & 0xFF; 
        $green = ($rgb >> 8) & 0xFF; $blue = $rgb & 0xFF; //sepia; 
        $red2 = min($red*.393 + $green*.769 + $blue*.189,255); 
        $green2 = min($red*.349 + $green*.686 + $blue*.168,255); 
        $blue2 = min($red*.272 + $green*.534 + $blue*.131,255); // shift gray level to the left $grayR = $red2 << 16;
        // R: red $grayG = $green2 << 8 ;
        // G: green $grayB = $blue2;
        // B: blue // OR operation to compute gray value $grayColor = $grayR | $grayG | $grayB; // set the pixel color imagesetpixel ($sourceImage, $x, $y, $grayColor); imagecolorallocate ($sourceImage, $gray, $gray, $gray);
    } 
} // copy pixel values to new file buffer
$destinationImage = ImageCreateTrueColor($img_width, $img_height); 
imagecopy($destinationImage, $sourceImage, 0, 0, 0, 0, $img_width, $img_height); // create file on disk imagejpeg($destinationImage, $destinationFileName); // destroy temp image buffers imagedestroy($destinationImage); imagedestroy($sourceImage); 
?>

Image Reflection

<?php
function imagereflection($src_img) {
  $src_height = imagesy($src_img);
  $src_width = imagesx($src_img);
  $dest_height = $src_height + ($src_height / 2);
  $dest_width = $src_width;

  $reflected = imagecreatetruecolor($dest_width, $dest_height);
  imagealphablending($reflected, false);
  imagesavealpha($reflected, true);

  imagecopy($reflected, $src_img, 0, 0, 0, 0, $src_width, $src_height);
  $reflection_height = $src_height / 2;
  $alpha_step = 80 / $reflection_height;
  for ($y = 1; $y <= $reflection_height; $y++) {
    for ($x = 0; $x < $dest_width; $x++) {
      // copy pixel from x / $src_height - y to x / $src_height + y
      $rgba = imagecolorat($src_img, $x, $src_height - $y);
      $alpha = ($rgba & 0x7F000000) >> 24; $alpha = max($alpha, 47 + ($y * $alpha_step)); $rgba = imagecolorsforindex($src_img, $rgba); $rgba = imagecolorallocatealpha($reflected, $rgba['red'], $rgba['green'], $rgba['blue'], $alpha); imagesetpixel($reflected, $x, $src_height + $y - 1, $rgba); } } return $reflected; } 
?>

Putting Text Vertically On Images

<?php
$string = 'Your Text';
$font_size = 2;
$img = imagecreate(20,90);
$bg = imagecolorallocate($img,225,225,225);
$black = imagecolorallocate($img,0,0,0);

$len = strlen($string);
for ($i=1; $i<=$len; $i++) {
    imagecharup($img, $font_size, 5, imagesy($img)-($i*imagefontwidth($font_size)), $string, $black);
    $string = substr($string,1);
}
header('Content-type: image/png');
imagepng($img);
imagedestroy($img);
?>

Putting Watermark On Images Watermark can be a png(with transparency) and can be placed anywhere on the image.

<?php 
function imagelogo (&$dst_image, $src_image, $dst_w, $dst_h, $src_w, $src_h, $position='bottom-left') { 
    imagealphablending($dst_image,true); 
    imagealphablending($src_image,true); 
    if ($position == 'random') { 
        $position = rand(1,8); 
    } 
    switch ($position) { 
        case 'top-right': 
        case 'right-top': 
        case 1: 
            imagecopy($dst_image, $src_image, ($dst_w-$src_w), 0, 0, 0, $src_w, $src_h); 
        break; 
        case 'top-left': 
        case 'left-top': 
        case 2: 
            imagecopy($dst_image, $src_image, 0, 0, 0, 0, $src_w, $src_h); 
        break; 
        case 'bottom-right': 
        case 'right-bottom': 
        case 3: 
            imagecopy($dst_image, $src_image, ($dst_w-$src_w), ($dst_h-$src_h), 0, 0, $src_w, $src_h); 
        break; 
        case 'bottom-left': 
        case 'left-bottom': 
        case 4: 
            imagecopy($dst_image, $src_image, 0 , ($dst_h-$src_h), 0, 0, $src_w, $src_h); 
        break; 
        case 'center': 
        case 5: 
            imagecopy($dst_image, $src_image, (($dst_w/2)-($src_w/2)), (($dst_h/2)-($src_h/2)), 0, 0, $src_w, $src_h); 
        break; 
        case 'top': 
        case 6: 
            imagecopy($dst_image, $src_image, (($dst_w/2)-($src_w/2)), 0, 0, 0, $src_w, $src_h); 
        break; 
        case 'bottom': 
        case 7: 
            imagecopy($dst_image, $src_image, (($dst_w/2)-($src_w/2)), ($dst_h-$src_h), 0, 0, $src_w, $src_h); 
        break; 
        case 'left': 
        case 8: 
            imagecopy($dst_image, $src_image, 0, (($dst_h/2)-($src_h/2)), 0, 0, $src_w, $src_h); 
        break; 
        case 'right': 
        case 9: 
            imagecopy($dst_image, $src_image, ($dst_w-$src_w), (($dst_h/2)-($src_h/2)), 0, 0, $src_w, $src_h); 
        break; 
    } 
} 

// example: 

imagelogo($image, $watermark, imagesx($image), imagesy($image), imagesx($watermark), imagesy($watermark), 'random'); 

?> {/code}

Make White Background Transparent

<?php

function transparentImage($src){  //making images with white bg transparent
$r1=80;
$g1=80;
$b1=80;
for($x = 0; $x < imagesx($src); ++$x)
        {
            for($y = 0; $y < imagesy($src); ++$y)
            {
                $color=imagecolorat($src, $x, $y);
                $r = ($color >> 16) & 0xFF; $g = ($color >> 8) & 0xFF; $b = $color & 0xFF; for($i=0;$i<270;$i++){ if($r.$g.$b==($r1+$i).($g1+$i).($b1+$i)){ $trans_colour = imagecolorallocatealpha($src, 0, 0, 0, 127); imagefill($src, $x, $y, $trans_colour); } } } } return $src; } $image='abc/abc.jpg'; $src = imagecreatefromjpeg($image); $src=transparentImage($src); //Lets make the jpegs transparent ?>

Crop Blank Edges From Image

<?php 
/** 
* $image image cursor (from imagecreatetruecolor) 
* $backgound image curosr (from imagecolorallocate) 
* $paddng int 
*/ 
function imageCrop($image, $background = false, $padding = 0) { 
    if($background) 
      $background = imagecolorallocate($image, 255, 255, 255); 

    $top = imageSY($image); 
    $left = imageSX($image); 
    $bottom = 0; 
    $right = 0; 

    for ($x = 0 ; $x < imagesx($image) ; $x++) { 
        for ($y = 0 ; $y < imagesy($image) ; $y++) { 

          // if there match 
            if(imagecolorat($image, $x, $y) != $background) { 

              if($x < $left) 
                $left = $x; 
              if($x > $right) $right = $x; if($y > $bottom) $bottom = $y; if($y < $top) $top = $y; } } } $right++; $bottom++; // create new image with padding $img = imagecreatetruecolor($right-$left+$padding\*2,$bottom-$top+$padding\*2); // fill the background imagefill($img, 0, 0, $background); // copy imagecopy($img, $image, $padding, $padding, $left, $top, $right-$left, $bottom-$top); // destroy old image cursor imagedestroy($image); return $img; } ?>

Stack of Papers Using CSS3 (With Ribbons and Animation)

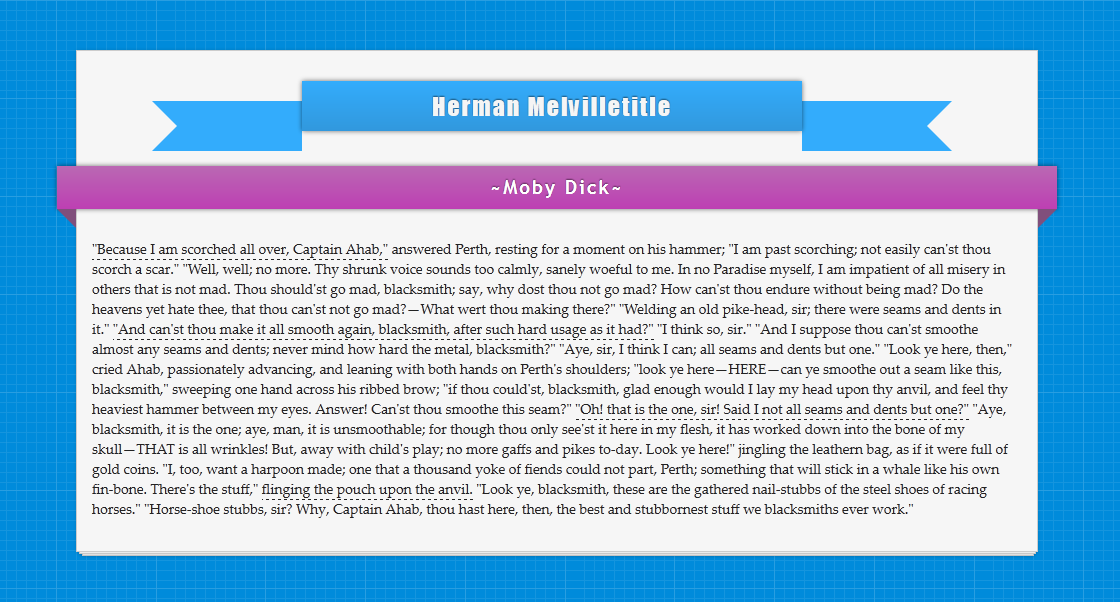
I had earlier written how we could create Animated Navigation Menu using CSS3. Now, in this post I am going to show how we can create stack of papers effect using CSS3 and then how we can add animations and ribbons using CSS only.

Stack of Papers Using CSS3

Live Demo // Download

Basic Stack of Papers

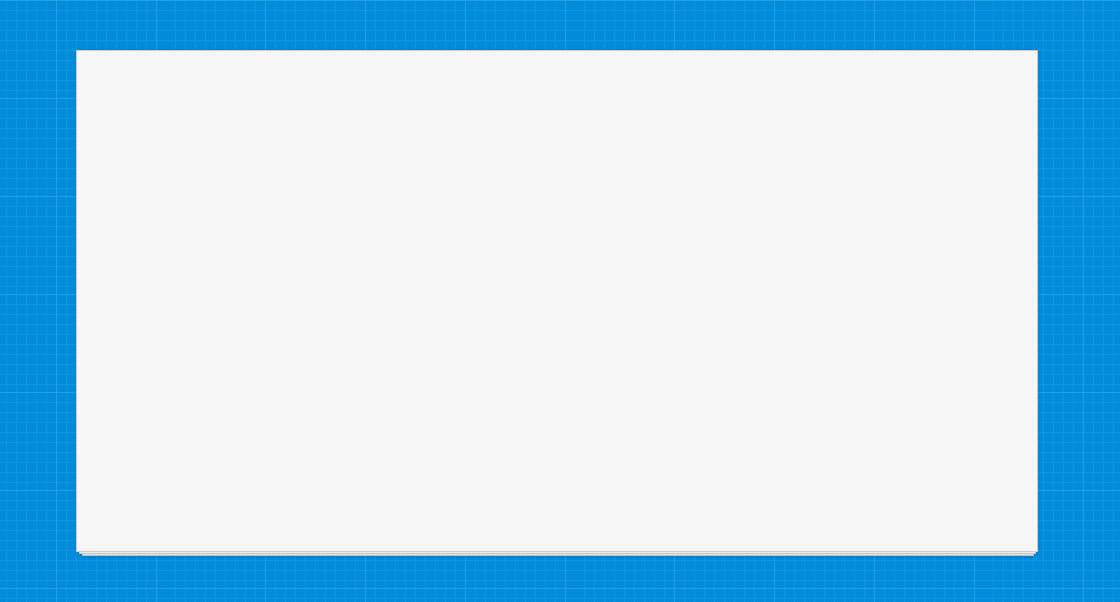
Basic Stack of Papers Using CSS3
Setting up basic stack of papers is easy, the code for it is below and you can see a live demo here.

The CSS

{code type=CSS}
body {
background: #333 url(http://priteshgupta.com/demos/papers/bg.png);
}
.stack {
background: #f6f6f6;
border: 1px solid #ccc;
height: 500px;
margin: 50px auto;
position: relative;
width: 960px;
-webkit-box-shadow: 0 0 3px hsla(0, 0%, 0%, .1);
-moz-box-shadow: 0 0 3px hsla(0, 0%, 0%, .1);
box-shadow: 0 0 3px hsla(0, 0%, 0%, .1);
}
.stack:after, .stack:before {
background: #f6f6f6;
border: 1px solid #ccc;
bottom: -3px;
content: ”;
height: 500px;
left: 2px;
position: absolute;
width: 955px;
z-index: -10;
-webkit-box-shadow: 0 0 3px hsla(0, 0%, 0%, .2);
-moz-box-shadow: 0 0 3px hsla(0, 0%, 0%, .2);
box-shadow: 0 0 3px hsla(0, 0%, 0%, .2);
}
.stack:before {
bottom: -5px;
left: 5px;
width: 950px;
}
{/code}

The HTML

{code type=HTML}


{/code}
However, if you will like more than three stack of papers, use the below CSS and see a live demo here.
Stack of Papers Using CSS3
{code type=CSS}
body {
background: #333 url(http://priteshgupta.com/demos/papers/bg.png);
}
.stack {
background: #f6f6f6;
border: 1px solid #ccc;
height: 500px;
margin: 50px auto;
width: 960px;
-webkit-box-shadow: 0 0 0 hsla(0, 0%, 0%, .5), 0 3px 0 -2px #f6f6f6, 0 3px 2px -2px hsla(0, 0%, 0%, .4), 0 7px 0 -4px #f6f6f6, 0 7px 2px -4px hsla(0, 0%, 0%, .4), 0 11px 0 -6px #f6f6f6, 0 11px 2px -6px hsla(0, 0%, 0%, .4), 0 15px 0 -8px #f6f6f6, 0 15px 2px -8px hsla(0, 0%, 0%, .4), 0 19px 0 -10px #f6f6f6, 0 19px 2px -10px hsla(0, 0%, 0%, .4), 0 23px 0 -12px #f6f6f6, 0 23px 2px -12px hsla(0, 0%, 0%, .4);
-moz-box-shadow: 0 0 0 hsla(0, 0%, 0%, .5), 0 3px 0 -2px #f6f6f6, 0 3px 2px -2px hsla(0, 0%, 0%, .4), 0 7px 0 -4px #f6f6f6, 0 7px 2px -4px hsla(0, 0%, 0%, .4), 0 11px 0 -6px #f6f6f6, 0 11px 2px -6px hsla(0, 0%, 0%, .4), 0 15px 0 -8px #f6f6f6, 0 15px 2px -8px hsla(0, 0%, 0%, .4), 0 19px 0 -10px #f6f6f6, 0 19px 2px -10px hsla(0, 0%, 0%, .4), 0 23px 0 -12px #f6f6f6, 0 23px 2px -12px hsla(0, 0%, 0%, .4);
box-shadow: 0 0 0 hsla(0, 0%, 0%, .5), 0 3px 0 -2px #f6f6f6, 0 3px 2px -2px hsla(0, 0%, 0%, .4), 0 7px 0 -4px #f6f6f6, 0 7px 2px -4px hsla(0, 0%, 0%, .4), 0 11px 0 -6px #f6f6f6, 0 11px 2px -6px hsla(0, 0%, 0%, .4), 0 15px 0 -8px #f6f6f6, 0 15px 2px -8px hsla(0, 0%, 0%, .4), 0 19px 0 -10px #f6f6f6, 0 19px 2px -10px hsla(0, 0%, 0%, .4), 0 23px 0 -12px #f6f6f6, 0 23px 2px -12px hsla(0, 0%, 0%, .4);
}
{/code}

Animating Stack of Papers

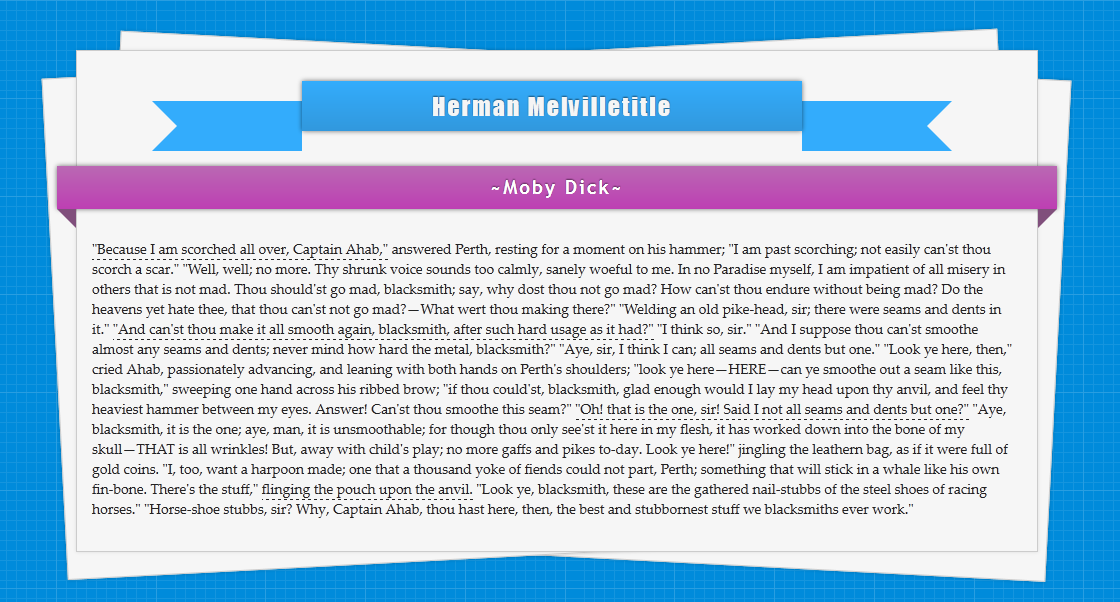
Stack of Papers Using CSS3
Now, I have added some content in it along with two CSS Ribbons and a simple animation to spread the stack of papers, though the easing animation is only available in Firefox(Since it only supports transition tags with Pseudo-elements). This is the final version, you can see a live demo here.

The CSS

{code type=CSS}
body {
background: #333 url(http://priteshgupta.com/demos/papers/bg.png);
font-family: ‘Palatino Linotype’, ‘Book Antiqua’, Palatino, serif;
}
p {
margin: 15px;
font-size: 14px;
font-family: ‘Palatino Linotype’, ‘Book Antiqua’, Palatino, serif;
color: #222;
position: relative;
float: left;
}
.stack {
background: #f6f6f6;
border: 1px solid #ccc;
height: 500px;
margin: 50px auto;
position: relative;
width: 960px;
-webkit-box-shadow: 0 0 3px hsla(0, 0%, 0%, .1);
-moz-box-shadow: 0 0 3px hsla(0, 0%, 0%, .1);
box-shadow: 0 0 3px hsla(0, 0%, 0%, .1);
}
.stack:after, .stack:before {
background: #f6f6f6;
border: 1px solid #ccc;
bottom: -3px;
content: ”;
height: 500px;
left: 2px;
position: absolute;
width: 955px;
z-index: -10;
-webkit-box-shadow: 0 0 3px hsla(0, 0%, 0%, .2);
-moz-box-shadow: 0 0 3px hsla(0, 0%, 0%, .2);
box-shadow: 0 0 3px hsla(0, 0%, 0%, .2);
-webkit-transition: all .5s ease-out;
-moz-transition: all .5s ease-out;
-o-transition: all .5s ease-out;
}
.stack:before {
bottom: -5px;
left: 5px;
width: 950px;
}
.stack:hover:after {
-webkit-transform: rotate(-3deg) translate(-25px, 0);
-moz-transform: rotate(-3deg) translate(-25px, 0);
-ms-transform: rotate(-3deg) translate(-25px, 0);
-o-transform: rotate(-3deg) translate(-25px, 0);
transform: rotate(-3deg) translate(-25px, 0);
-webkit-transition: all .5s ease-out;
-moz-transition: all .5s ease-out;
-o-transition: all .5s ease-out;
}
.stack:hover:before {
-webkit-transform: rotate(3deg) translate(25px, 0);
-moz-transform: rotate(3deg) translate(25px, 0);
-ms-transform: rotate(3deg) translate(25px, 0);
-o-transform: rotate(3deg) translate(25px, 0);
transform: rotate(3deg) translate(25px, 0);
-webkit-transition: all .5s ease-out;
-moz-transition: all .5s ease-out;
-o-transition: all .5s ease-out;
}
#main {
font-family: Impact, Charcoal, sans-serif;
letter-spacing: 2px;
margin-left:75px;
margin-top: 50px;
text-shadow: 0 -1px 1px hsla(0, 0%, 0%, .5);
}
#menu {
background: #33acfc;
width: 500px;
height: 50px;
color: #F5F5F5;
font-size: 24px;
text-align: center;
position: relative;
top: -20px;
background-image: -webkit-gradient(linear, left top, left bottom, from(#33acfc), to(#3198dd));
background-image: -moz-linear-gradient(top, #33acfc, #3198dd);
background-image: -o-linear-gradient(top, #33acfc, #3198dd);
-moz-box-shadow: 0px 0px 4px rgba(0, 0, 0, 0.55);
-webkit-box-shadow: 0px 0px 4px rgba(0, 0, 0, 0.55);
box-shadow: 0px 0px 4px rgba(0, 0, 0, 0.55);
}
#menu span {
position: relative;
top: 10px;
}
.cont {
background: #33acfc;
width: 100px;
height: 50px;
}
.edge-right {
border-color: #33acfc transparent #33acfc #33acfc;
border-style:solid;
border-width:25px;
width: 0;
height: 0;
position: relative;
}
.edge-left {
border-color: #33acfc #33acfc #33acfc transparent;
border-style:solid;
border-width:25px;
width: 0;
height: 0;
position: relative;
}
.left {
float: left;
}
.right {
float: right;
}
.ribbon {
width: 980px;
font-size: 19px;
font-family: ‘Trebuchet MS’, Helvetica, sans-serif;
letter-spacing: 2px;
text-shadow: 0 -1px 1px hsla(0, 0%, 0%, .5);
position: relative;
background: #ba89b6;
color:#FFF;
text-align: center;
padding: 10px;
margin-left: -20px;
-moz-box-shadow: 0px 0px 4px rgba(0, 0, 0, 0.55);
-webkit-box-shadow: 0px 0px 4px rgba(0, 0, 0, 0.55);
box-shadow: 0px 0px 4px rgba(0, 0, 0, 0.55);
background-image: -webkit-gradient(linear, left top, left bottom, from(#ba68b3), to(#bd3fb3));
background-image: -moz-linear-gradient(top, #ba68b3, #bd3fb3);
background-image: -o-linear-gradient(top, #ba68b3, #bd3fb3);
}
.ribbon .ribbon-content:before, .ribbon .ribbon-content:after {
content: “”;
position: absolute;
display: block;
border-style: solid;
border-color: #804f7c transparent transparent transparent;
bottom: -1em;
}
.ribbon .ribbon-content:before {
left: 0;
border-width: 1em 0 0 1em;
}
.ribbon .ribbon-content:after {
right: 0;
border-width: 1em 1em 0 0;
}
a {
text-decoration:none;
color: inherit;
border-bottom: dashed 1px #222;
-webkit-transition: all 1s ease-out;
-moz-transition: all 1s ease-out;
-o-transition: all 1s ease-out;
}
a:hover {
background:rgba(51, 172, 252, 0.35);
-webkit-transition: all 1s ease-out;
-moz-transition: all 1s ease-out;
-o-transition: all 1s ease-out;
}
{/code}

110 Best CSS3 Tutorials and Examples

I have been publishing articles about CSS3 for a while now. CSS3 opens the door for a lot of unique techniques for websites, that is why CSS3 has acquired an important place in web design. Earlier web designers were forced to use Photoshop for various things like gradient, shadows, etc, and jQuery/JavaScript for simple animations. There was no method to implement these functionalities using CSS. But then CSS3 came with its fantastic features. In this article, I have collected a huge list of the best CSS3 examples and tutorials on the Internet. For CSS Tools, check out this.